Getting Images Into Petrel
Your image should be saved as a .jpg or .png (I have more information on the main Image Tips page). Import it through the usual method with Bitmap image as the file type.
Georeferencing
In order to locate the image as a map or section you will need the coordinates of the 4 corners. You can get these from ArcMap (the Extent tab) or from GDAL if you have a georeferenced image (run gdalinfo on the file). Unfortunately you cannot import files with their geospatial information intact.
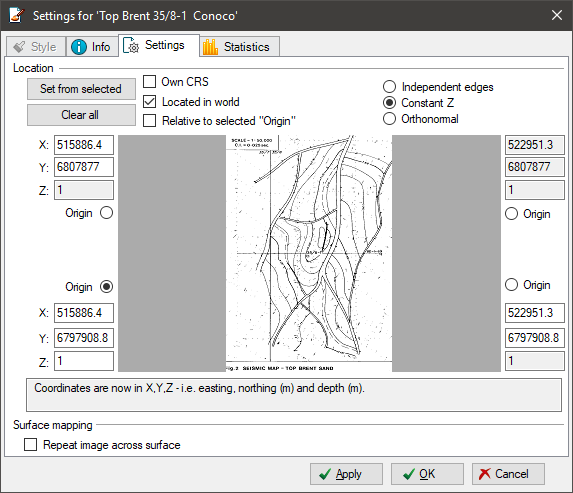
In the Settings of the image file open the Settings tab and select Located in world. If it's a map image then you can choose Constant Z to set a prescribed height. Fill in the corner coordinates with your values as press Apply.

Locating an image in Petrel
Image Draping
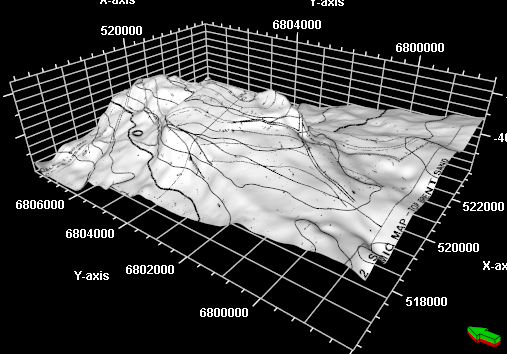
Once the image is imported and referenced you can apply it to a surface. In the Settings of your surface change the Style > Solid > Color to Textured, and add your image to the texture image box.

Draping an image over a surface
Getting Images Out Of Petrel
Methods vary a lot depending on what sort of window you have open:
2D & 3D Windows
With the window selected, oen the related tab and under Capture choose Export graphic. Again, with my image tips in mind choose a file format but look at the NxN options to save larger (higher-resolution) images. Note: screen furniture may not scale properly so either make it larger or stitch your own on in an image editing program.
Well Section and Interpretation Windows (etc)
The technique here is to "print" the window at a large paper size then extract and compress the result. Look in the print menu for SDI Print to PDF and, once selected, modify the % of actual value (I recommend started at 400%).
Once the PDF is saved (which may take a while) open it in a vector editing package like Corel, Inkscape or Illustrator. Depending on the window that you have used you may be able to ungroup the objects and tease the underlying image(s) out of the PDF. You can then save them seperately.